Sunday, June 30, 2013

Summer Cheetah Print Nails!

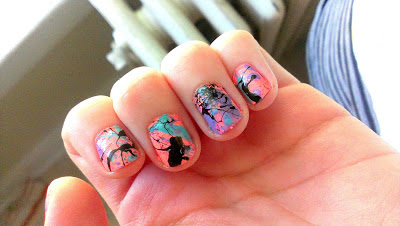
I was scoping pinterest when I came across a photo of cheetah print nails. I really liked the cheetah print idea but I didn't want to go all out with every single nail animal print. I wanted something summery, but edgy and cute. So then below that photo I saw a cute nail design but with this amazing light blue color and thats when it hit me! I would combine them both! I came up with the design below (:


Later on I did some more research for the design and I did see a couple other designs like this using the same colors, so I didn't feel so original anymore haha. I absolutely love these nails! I think they're best I've done so far and my boyfriend even loves them! I got so many compliments at work and I literally can't stop starring at them. They look so cute and its really so simple to do. 

If you want to see how I did this nail design leave me a comment below and I'll make a tutorial video for it (: Also, if you try this nail design or have other designs you'd like me to see or try out on myself send them to me!

Friday, June 28, 2013

How To: Resize A Tshirt

I was looking through some of my old blogs and I found this video I made almost a year ago about resizing tshirts. I went through this huge phase where I would ask EVERYONE if they had old tshirts and I would just spend hours in the basement resizing them to fit me. I mostly used them for pajamas shirts, the few that came out really good I wore in public. I thought I'd share this old video with you guys in case you wanted to know how to resize shirts! Enjoy!


Polka Dot Nails!


Cute summer polka dot nails! I recently bought a dotting tool and really wanted to test it out so I looked up all of these tutorials on YouTube for polka dot nail designs and I came across one that mainly focused the dots on the bottom of the nails. Mine didn't come out as great as hers, but I really liked it! And I got tons of compliments on them. It's super easy, not messy at all, and really cute! Below I posted the tutorial I found on YouTube. Its the same user I posted earlier for the paint splattered nails using straws.


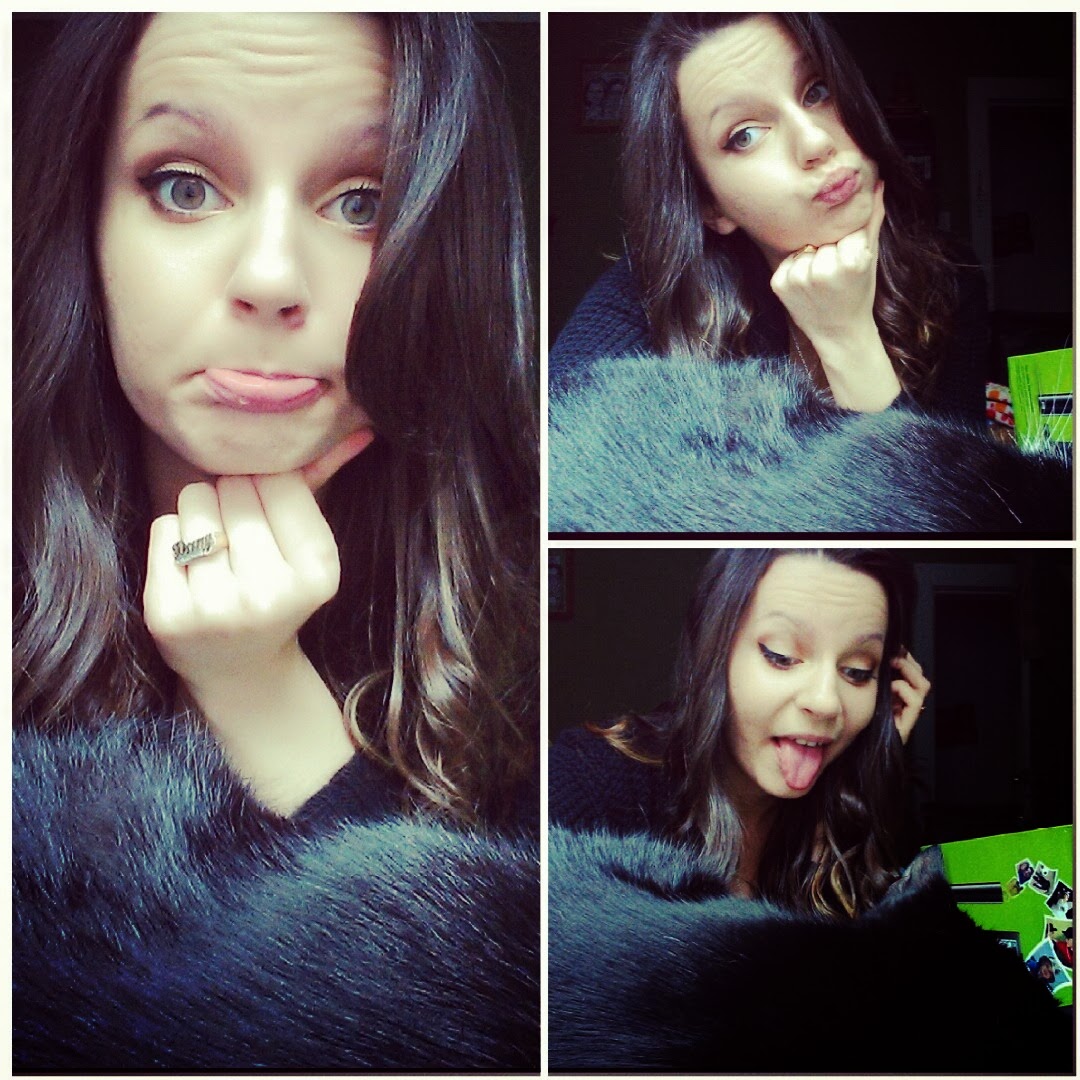
Also, I might be posting up a video on how to get the look I have below, or maybe a "get ready with me" video just so you can see how I do my hair and makeup on a regular basis. Let me know what you'd like to see!

Tuesday, June 25, 2013

Lucy Hale In NYC

On Sunday June 23 Lucy Hale was in Union Square doing a meet greet for her BONGO sponsors. I waited in line for almost five hours to meet her and get an autograph and photo and I didn't even get one! I was so disappointed. The people running the event were definitely disorganized. They didn't even end up going with the line so people behind me got to meet her and I didn't. I was pretty upset, but I did get to take a couple pictures of her. Hopefully next time I decide to camp out and meet a celebrity it's a whole different experience haha.
The line to see Lucy Hale
Lucy Hale posing before she left
Lucy Hale meeting her fans 


Thursday, June 20, 2013

Nail Art: Using A Straw


I was searching through YouTube for some really easy nail designs to do one night when I was bored and I came across a YouTuber by the name of MissJenFABULOUS who had this one video about doing nail art with a straw. So I watched and OMG was it easy! I gave it a shot, and honestly theres no way anyone could screw up this nail art design. It's so unpredictable and each nail is different in its own way. I got so many compliments on my nails the whole week I wore this manicure. I absolutely loved it! And I'll definitely be trying it again with different colors. Below I listed the colors and brands I used to achieve this specific splattered look. I also embedded the video onto this post so you can watch and learn how to do this yourself at home!

Base Colors
Flip Flop Fantasy by China Glaze

Splatter Colors
No Hard Feelings by Sally Hansen
Where's My Chauffeur by Essie
Black on Black by Sinful Colours

Top Coat
Out The Door Fast Drying Top Coat

UPDATE! 6/25/13
Just thought I'd post up another photo of the same nail design with different color schemes! I really loved this one. It was simple and subtle and very summer like! (:

Base Color
Nice is Nice by Essie
In Stitches by Essie (Accent nail)

Splatter Colors
Nice is Nice by Essie
In Stitches by Essie
Pop Art Pink by Essie

Top Coat
Out The Door Fast Drying Top Coat


Hey Bloggers, Meet My Mommy!

My mom recently came to visit me in Jersey and I was so excited! We did so much in the little time she was here. We visited the circus, went to a huge three floor mall, and managed to make it to a family party down in south Jersey. I was really upset when she had to leave, but she'll be coming back next month so it isn't so bad! I just wanted to share some photos with you of our time together! (:

Car Ride to South Jersey
Being silly at the Bridgewater Mall
Tigers at the circus!
The coolest elephant trick ever!


Wednesday, June 12, 2013

Gettin' My Wand On!


Recently I bought a wand, (I know jumping on the wagon a little late!) and I thought my hair type wouldn't really take it well, but I was totally wrong. The photo above shows how it came out for my first try. I used large sections of hair so the curls weren't as defined as most are using wands. I figure I have plenty of time to play around with it and figure out how to use it. I didn't hairspray them and the curls lasted all day, so it was really surprising considering with regular curling irons I don't get as much of a curl or wave as I did with this one. I really liked it, and will definitely be posting up some photos soon when I figure out how to really style my hair with this thing (:


This is the wand I used. It's a Joystick by Hot Dog. It's really great. I love that its tappered because it makes the curls look a little bit more natural if you use larger sections. It heats up pretty fast, and has a digital reading that counts up to the heat setting you put it on so you know when its ready. The cord is pretty long too, which is a really big factor for me when buying hair appliances because I move around a lot when I'm doing my hair.


These are just some of the features of the appliance. 


This is what comes inside the box. The glove is definitely helpful for a beginner. I tried one curl without the glove and really burned my hand! So I've learned to just swallow my pride and use the glove haha. I also love that the wand is a pretty blue color! It's really cute and makes it easier to see when it's dirty and needs a little cleaning. 


This is just how I styled it today. It's not perfect thats for sure, but I'm learning how to make it better. If you have any tips please let me know!


Latest Internet Find: Threadbanger

I was recently spending some time in the basement of my boyfriends school waiting for him to finish up his summer math course when I YouTube's about 4000 videos on how to curl hair and apply eyeliner. After clicking on one of the videos there was an ad and the first thing they said was "don't click that skip ad button!" And for some reason I didn't. They advertised a bunch of DIY things on spicing up clothing or making jewelry out of recycled items. I watched their videos for hours and felt so inspired to take a trip into my closet to find things I could do with my old clothes. I'm really excited to actually try some of the beginner things they were talking about.

Everyone should definitely think about swinging by their YouTube channel and watching some of their videos on how to spice up those old tees you're thinking about throwing out. Just go onto YouTube and type in "threadbangers" and you'll be instantly connected to tons of their videos :)

Tuesday, June 4, 2013

Define Your Natural Curls!


Want to bring your curls back to life?! It's easy! Heres how I control my curls and add definition to them!

What You'll Need
I. Leave-in Conditioner + Heat Protectant ( I used Biosilk silk therapy 17)
II. Curl Defining cream or lotion ( I used organix curl defining yogurt)
III. Beach Spray ( I used Biosilk beach texture)
IV. Frizz serum (I used organix coconut milk anti breakage serum)
V. Blow Dryer with Diffuser ( I used Babyliss ceramix extreme)
VI. Three barral waver ( I used Revlon jumbo waver)

Steps
I. Wash hair with any shampoo and conditioner! ( I used Dove oil care blend)
II. Comb out your hair with a wide toothed comb 
III. Apply your leave-in throughout all of your hair and comb through
IV. Apply your curl defining cream by scrunching up your hair to the curl form 
V. Apply a few spritz of your beach spray to get some added texture to your curls
VI. Grab your blow dryer and diffuser and diffuse on the lowest setting with warm heat, flipping your head over to add some volume
VII. Heat up your waver and go over any pieces that seem to have fallen flat or look undefined. (You can also do this with a curling iron or wand depending on what kind of curl you have)
VIII. Apply your frizz serum to the ends of your hair to get rid of any extra frizzies that formed

You'll have beautifully defined curls once you've figured out what products work well for your hair type! It just takes a few tries (:


June Favorites!


Organix Argan Oil & Shea Butter Curl Enhancing Yogurt
Since my hair is gainging its natural curl back I've been on the lookout for some really great curl products when I came across this. I know Argan Oil and Shea Butter is really great for your hair so I figured I'd give it a shot. It really helps bring out the natural curl and define them! Plus it smells really great. The texture is very creamy and definitely helps with the frizzing that comes with naturally curly hair.

I bought this 8 oz jar for $8.86
You can also find this product at the following places, Wal-MartUlta.com, and Walgreens

Biosilk Silk Therapy 17 Miracle Leave-in Conditioner
This product is perfect for prepping hair to do anything. I usually use this before heat styling my hair because it doubles up as a heat protectant. Its a spray so I feel like its way easier to evenly distribute it on your hair. I just love the way this makes my hair feel and how I can use it to do so many different things. On the back of the bottle is a list of the 17 different benefits you get from using this product. It's really just great.

I bought this 5.64 oz bottle for $17.76
You can also find this product at the following places, Ulta.comFarouk, and Beauty Store Depot

Hask Henna 'n' Placenta Masque
This is by far the BEST deep conditioning treatment EVER! It's so hydrating. My hair feels so amazing right after and it lasts for days! It's definitely something I would try if you have really damaged hair. I use the super strength one because I have naturally curly hair and it tends be dry often. I just apply the masque after shampooing and leave it on for about 10-15 minutes with a warm towel wrapped around my head. 

I bought this 2 oz packet for $1.49
You can also find this product at the following places, Walgreens and Wal-Mart

Wild Berry Vanilla Perfume
I love this scent! It's so sweet and light, its totally great for the summer! The only down side is it comes in such a small bottle I go through it so fast! This scent is just so me this summer! 

I can't tell you where I got it or how much I got it for. My boyfriend just surprises me with a new bottle every time I run out and I've never been able to find it online! He's got some sort of secret supplier haha

Clinique High Definition Lashes
What I like about this mascara is that the brush is great for getting those long defined lashes. One side is a comb to help evenly distribute the mascara and make the lashes appear longer by separating them and the other side is a regular mascara brush to apply a thicker coat of it to make them look fuller. I really like how defined it makes my lashes look. It's great for subtle makeup and glam makeup looks!

I got this as a free product from a $25 and over purchase I made 
But you can find this product at Macys